Installing the steel RSJs
Introduction
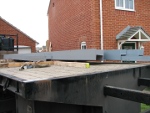
Installing the steel RSJs is the first of the major structural works to be completed. Most loft conversions use steel RSJs (rolled steel joists) to support the weight of the new floor. Our conversion is very typical and requires two steel RSJs to support the new floor and a third to support the ridge of the roof. A loft conversion can be made entirely from timber joists but the increased costs (materials and labour) mean that just about every loft conversion uses steel RSJs. The smaller steel to support the ridge was supplied in two sections and the two main steels were supplied in complete sections. Now for the tricky bit, getting some rather heavy 6 metre steel RSJs up and into position!
The two main steels
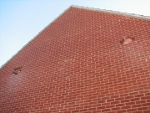
Installing the steels in complete 6 metre has some advantages, they are cheaper to buy and there is less labour as there is no need to bolt sections together. We were lucky enough to be detached and have good access at one side. This meant we could knock holes in the gable wall and use a crane to manouvre the steels into place. Two holes were made in the gable wall, the outer brick skin will not be taking any load, the steels will be supported by the concrete block inner wall with the steels resting on concrete pad stones.
Craning the steels in
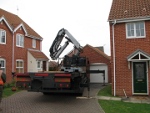
The plan was to use the crane to lift the steels up to the holes in the gable wall and slide them into the loft space and into position on the padstones. The first steel was attached to the crane with large chains and the crane operator started to hoist the steels up. These cranes are impressive to see in action, the crane is operated by remote control meaning the driver can move around to get the best view of the object being lifted, see below for a video of the crane in action. These cranes look and move very much like the robot arms you see building cars in factories. The first steel was lifted up horizontally and one end was guided into the hole by a builder on a ladder. Builders inside the loft space then helped to pull the steel into the loft space.
Videos of the Crane in Action
In the first video below you can see the crane arm moving out into position to pick up the first steel RSJ.
In this next video you can see the steel RSJ is hooked to the crane with large chains and the lift has started.
Steel RSJ for the Ridge Support
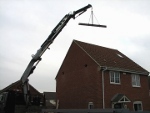
The steel RSJ to support the ridge of the roof was delivered in two sections that would be bolted together. The crane was used to lift these over the top of the house and into the loft space via an opening that had been made by removing some of the roof tiles. Using the crane for these steels was not essential as they could have been lifted by hand into the loft space. However, using the crane is both faster and safer.
Steels in Place
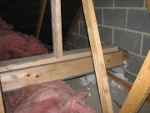
With the help of he crane it only took a few hours to get the steels into position. In fact the builders had already started on the timber work before I had a chance to take a photo of the steels in position! The piece of timber that is inserted in the steel will be bolted in position and will have the joist hangers nailed on to support the floor joists.