Example Loft Conversion
Introduction
Ever wondered what is involved in a completing a loft conversion? We have documented our own loft conversion from start to finish, with lots of photos and videos of all stages of the build. We hope it will give you an interesting insight into what is involved at each stage of the build. Our house is a 3 bedroom detached built in 2000 with a modern truss rafter design roof, but the conversion process will be pretty much the same for any house of a similar size and construction.
This page is not yet complete but we thought we would put it live as a work in progress to allow readers to track the progress of our loft conversion. Last update to this page was on 01/03/2010.
Feasibility, Preparation and Planning
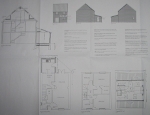
It was certainly feasible to convert our loft into a bedroom, luckily our existing roof has a very steep pitch meaning
the internal headroom was more than enough. The internal layout of the house meant that we could remove an airing cupboard
to make way for the stairs without having to sacrifice any space in the existing bedrooms. This also meant that the new stairs would
be above the existing stairs, making the conversion appear to be part of the original build.
Read more »
Light and Air with Velux
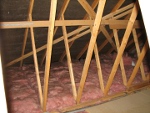
Unconverted lofts are not always the nicest of environments to work in, often they are dusty, hot in the summer and dark with
no natural light. Velux windows are quick and easy to install and will solve these problems making for a much more pleasant working
environment. In this section you will find photos and videos of the loft before work started and how the Velux rooflights were installed.
Read more »
Installing Steel RSJs
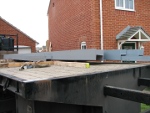
Installing the steel RSJs is the first of the major structural works to be completed.
Most loft conversions use steel RSJs (rolled steel joists) to support the weight of the new floor. Our conversion is very typical
and requires two steel RSJs to support the new floor and a third to support the ridge of the roof. A loft conversion can be made entirely
from timber joists but the increased costs (materials and labour) mean that just about every loft conversion uses steel RSJs. The smaller steel
to support the ridge was supplied in two sections and the two main steels were supplied in complete sections. Now for the tricky bit, getting
some rather heavy 6 metre steel RSJs up and into position!
Read more »
Structural Timber Work
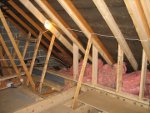
Now that the steels are in place work can start on removing the trusses and putting in the additional timber work that will transfer
the roof load down onto the steels. At this stage most of the work is fairly straightforward carpentry, those working on a
DIY loft conversion
should find this stage fairly easy. Note the building the staircase is a highly skilled task that is probably best left to a specialist
stair firm, as was the case with this conversion. So lets look in more detail at the work completed during this stage.
Read more »
Installing the Staircase
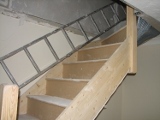
Getting the staircase installed is a major milestone in the conversion process, it connects the loft space to the rest of the house
and the loft now starts to feel like another room. From a planning perspective its the installation of a set of permanent stairs that
defines the new bedroom as a bedroom rather than storage space. There were a few jobs that need to be addressed before we were ready
for the stairs to be installed, I'll explain each step in detail.
Read more »